


In this tutorial, we’re going to be using PuTTY to connect to your managed VPS, Cloud or dedicated server via SSH. For Windows users without an SSH client, we recommend you download PuTTY or enable OpenSSH.
Requirements for using SSH to login to your VPS or Dedicated Server
There are a few requirements for using SSH with your VPS or Dedicated Server. These include making sure that your account has been granted SSH access and that your IP address has been added to the firewall. The following articles will help you meet these prerequisites:
|
Terminal on Linux/macOS/BSD
This applies to Windows users with OpenSSH: Open the Start menu,select Powershell, and then Run as Administrator.
If you are trying to directly connect from a Linux or Mac terminal via SSH, please note the format of the command would need to be in this format:
[Bob ~]$ ssh [email protected] -p 22
If you do not specify the full username such as username@example, the server would instead try to login as your local user, in this case [email protected], and because that user doesn’t exist on the server you’d get a login error.
Usually for your first SSH access to your VPS you've to use "root" username like this: ssh root@IP-ADDRESS -p 22
Settings for using PuTTY
PuTTY is a free, open-source terminal emulator written by Simon Tatham that gives you access to SSH. It supports several different network protocols. Before we open PuTTY, you’ll need the following settings:
Your hostname and username can be found in the Technical Details of your VPS /Server delivery/welcome email
Host Name:As your hostname, you can use either your server’s ip address, your domain, or your server name (as in vps####.ihostpanel.com or biz152.ihostpanel.com)
Username:Use your VPS root username.
Password:Use your VPS password.
How to connect using PuTTY
In this tutorial, I am using 203.0.113.0 IP address as the host name, “root” as the VPS username, and the ******** as the password.
- Open Putty.
- Enter your hostname.
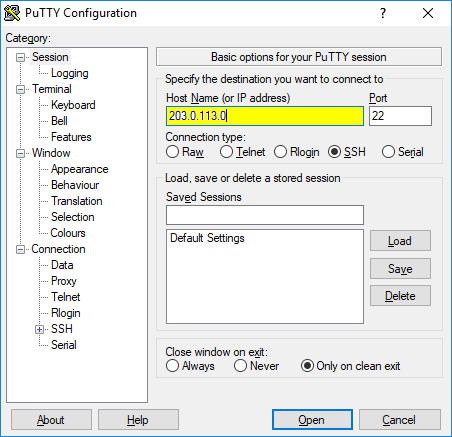
3. Click “Open“.
Can’t connect? Getting an error message Network Error: Connection timed out? Be sure to add your ip address to the firewall.
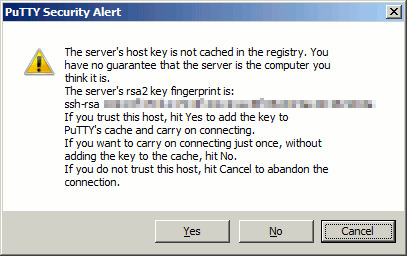
4. If you get a “PuTTY Security Alert“, click yes to continue (If you read the message, this is your server so you should trust it).
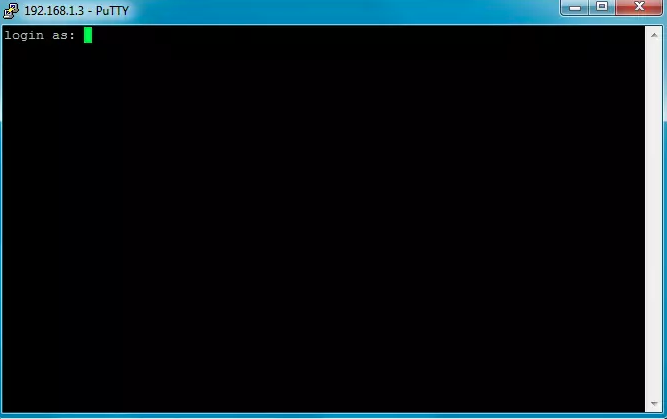
5. You will see “Login As“. Please enter your username and then hit Enter.
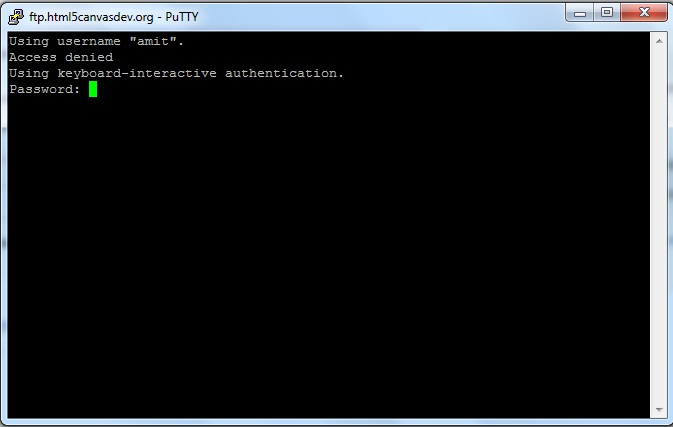
6. You will then see root@hostname password:. Enter your password and hit enter. For security reasons, PuTTY will not show anything when you type your password, this is normal.
7. When you have successfully logged in, you’ll see root@hostname [~]#.
Note! If you get an error stating Shell Access is Not Enabled on your server, you will need to contact tech support to have our higher level of support enable the shell access.
Congratulations, you have now successfully logged into your server via SSH!
